Over in the projects section you will find a bit of history of the work I have done making robots paint with brushes, pens and spray cans. This has always been with other people’s robots. Owning your own industrial robot is out of reach for most people, if not just because of budget but also, where would you install it?
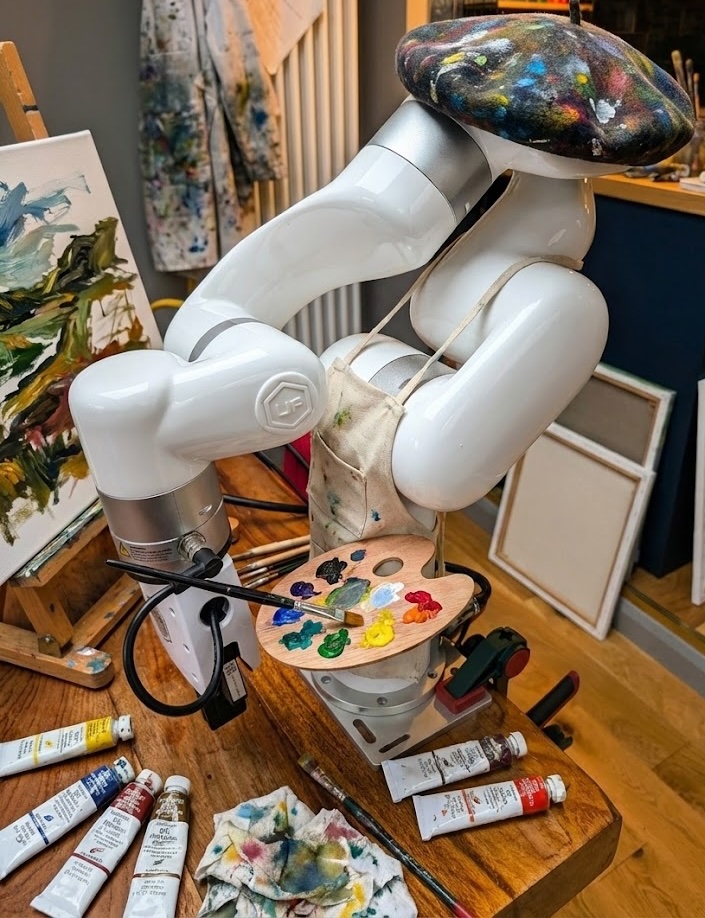
That’s where the UFactory xArm comes in with a little help from a serendipitous reddit post from someone wanting to find a new home for their underused unit. Over the christmas break I took delivery of a xArm 6 robot. Its not huge, so I can safely use it in the office, and its set up pretty well for easy development (Unlike some of the more establish robot brands who are very locked down). It is very much an extracurricular activity in the short term but I have some ideas of how to put this little guy to use. So far Ive spent about two days looking through the SDK, and testing what it can do.
Step 1: Hello World (Physical Edition)
Getting a 6-axis industrial arm out of the box is a bit more complex than setting up a new laptop. The first few day was spent just getting familiar with the beast—understanding the SDK, the safety protocols, and the basic kinematics.
There is a specific thrill in writing code that results in physical movement. It’s not just pixels changing on a screen; it’s a hunk of metal swinging through the air because you typed a command. I spent some time developing a custom Python wrapper for the SDK to make the control smoother and more intuitive for the kind of generative art I want to produce.
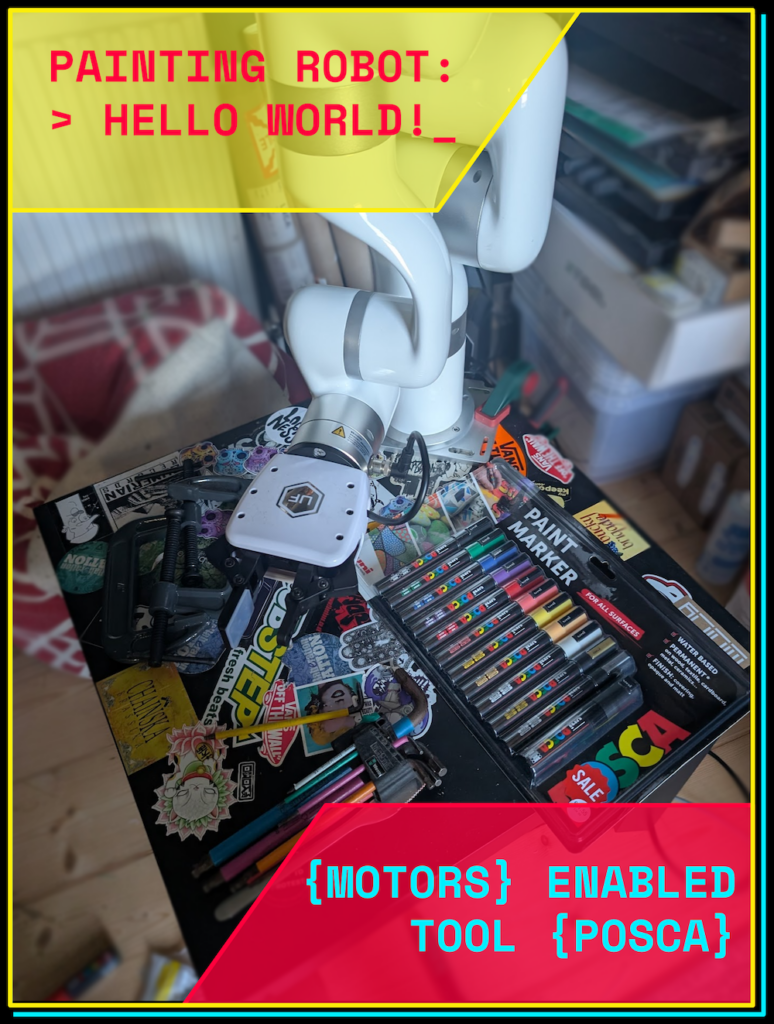
Step 2: The Tools
Once I could make it move, I needed to make it do something.
I decided to start with Posca paint pens. They are reliable, opaque, and frankly, a lot less messy than the spray cans I’ve used in the past. But a robot gripper isn’t designed to hold a pen; it’s designed to pick up widgets in a factory.
I jumped into CAD and designed a set of custom fixings that allow the robot’s gripper to securely pick up, hold, and manipulate the pens. A few hours of 3D printing later, and the robot had its first “hand” and it can hold posca pens like a Berlin street tagger. What is really exciting is I have designed these with tool changing in mind. With some more design & 3D printing I will be able to the change the pend used to a new color, and then paint brushes and maybe even spray cans.
Step 3: From SVG to Trajectory
The next step of this puzzle was the software pipeline. Initially I went about wrapping the UFactory SDK with my own python system, then started to make a path planner and tools for interpreting image data into robot motions.
I was recently working with UWE’s new bridge Studio developing some AI for robot painting and as part of that we needed to convert SVGs into robot waypoints. So I have used and modified some of that code to work with this new system. Whats good about this is rather than being tangled up in too much python to instruct the robot, I can draw something in Inkscape, run it through a script and send it to the robot.
It’s early days, but seeing the robot pick up a pen and trace a drawing I made on my computer is incredibly satisfying. It’s no longer just a machine; it’s becoming an extension of my own creative process.
This should be a first post of hopefully many updates as I make the system better, and essentially collaborate with a robot to make new art.
Stay tuned.
Leave a Reply